When you first get into Windows 10, it can be a bit difficult to find your way around. Find your apps, files and resources quickly can become a chore, making it harder to get your work done.
If you’re anything like me, I hate having to look for things on my computer. I like having all my apps in one place, my files together and so on. Windows 10 allows you to customize the start menu; meaning you can remove app tiles you don’t use, and add the ones you use all the time. You can do the same with the task bar along the bottom. Why not add the apps you most use down there? In the Creator’s Update you can take this a step further and create tile folders.
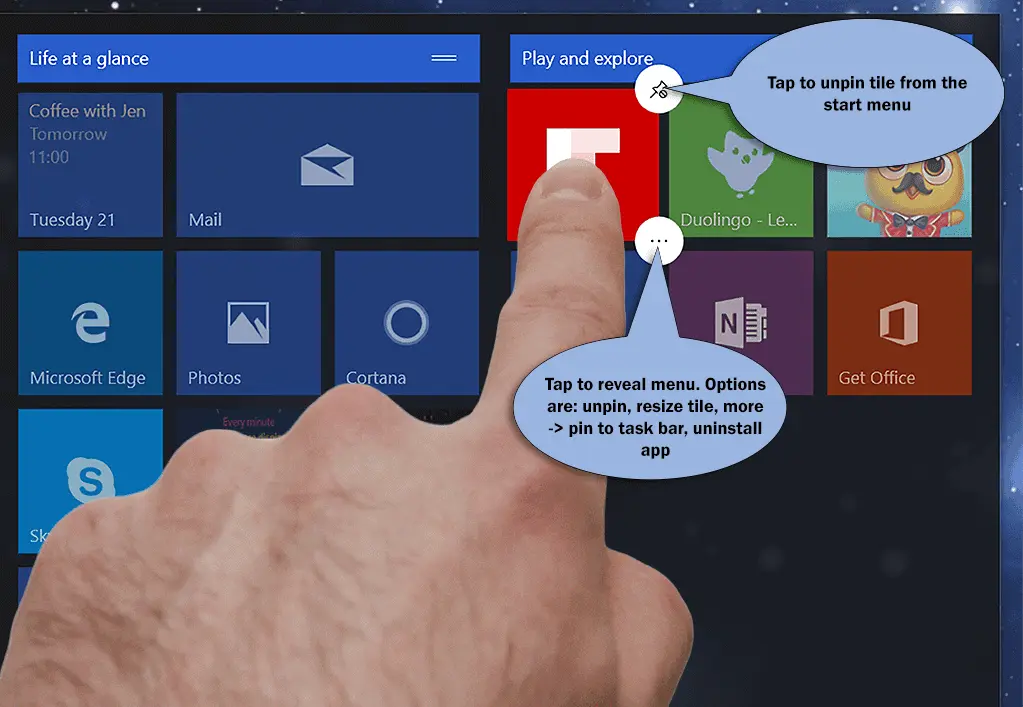
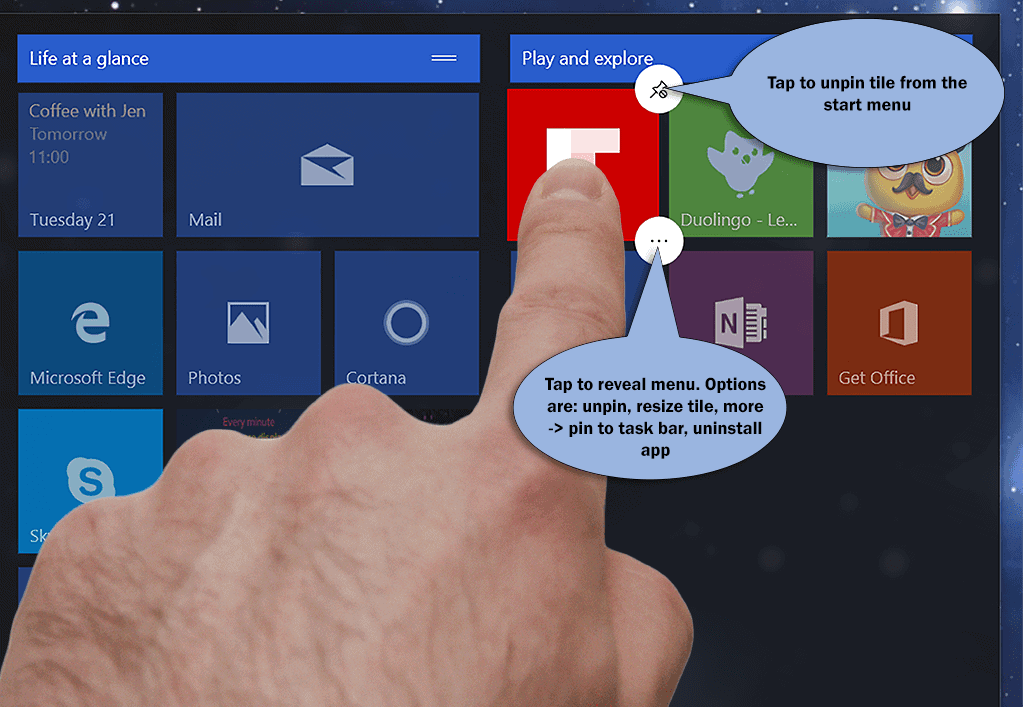
Start by clearing out all the rubbish you don’t use. Tap and hold your finger on the tile you want to get rid of. Right click if you are using a mouse. Tap on the drawing pin icon on the top right of the tile. This will remove it from the start menu. Do this with all the tiles you don’t want.
Now add the tiles you want. Tap and drag the apps from the alphabetical list into position on your tile area. Click and drag them if you’re using a mouse.
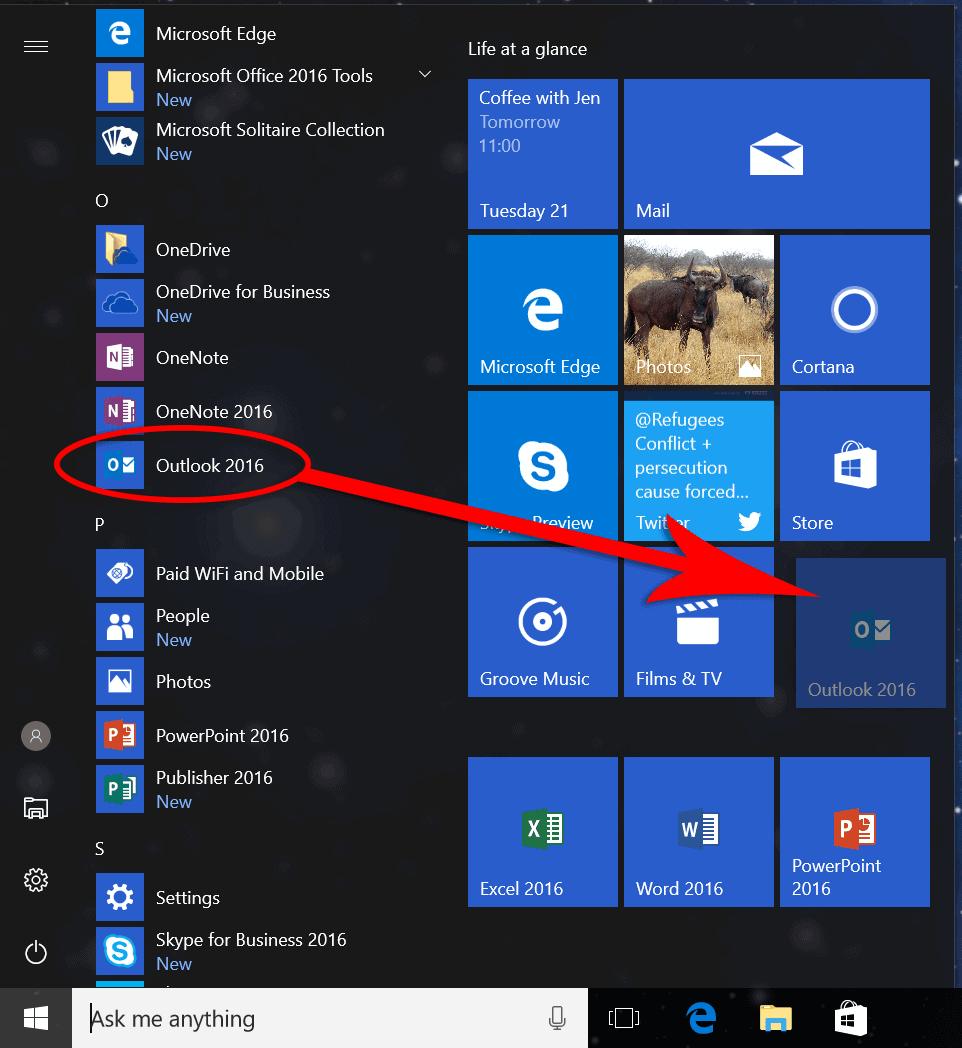
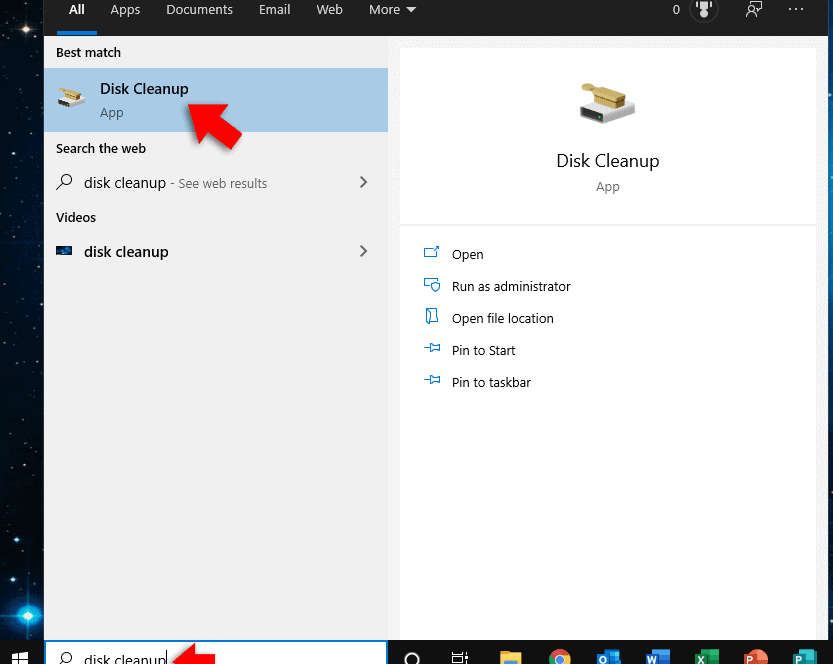
If you can’t find them, try typing the app name into the ‘ask me anything’ Cortana Search field. Tap and hold your finger on the app in the results and select ‘pin to start’ from the menu.
Tap and drag your app tiles into logical groups so they are easy to find. You’ll end up with something like this…
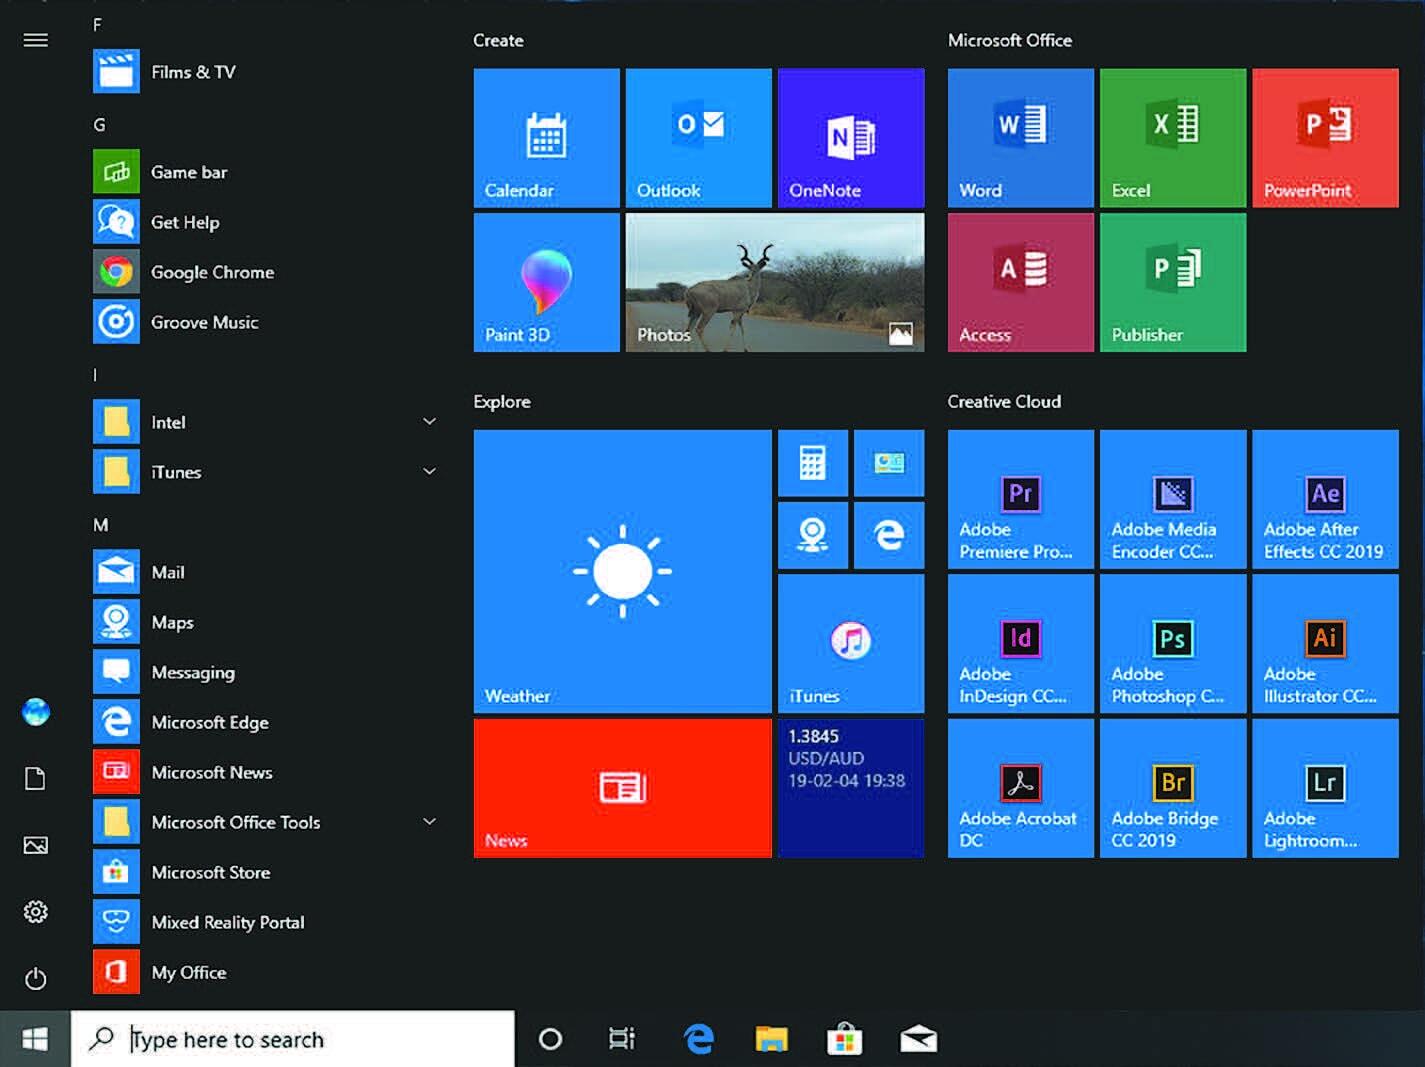
As you can see, all the app tiles are grouped together logically. All my Office apps are together, my Adobe creative apps are together and so on. No more searching down lists for apps.
Try dragging the app tiles to your task bar along the bottom of your screen. Now you don’t even have to open the start menu to launch your most used apps.