Google Docs is a widely-used online, cloud based word processing tool that enables you to create, edit, and store documents in the cloud. Launched in 2006, it has become a staple for individuals and businesses alike in crafting various types of documents, such as reports, essays, and articles, without the need for traditional software installation. One of the standout features of Google Docs is its collaborative nature, allowing multiple users to work on a single document simultaneously, providing real-time updates, facilitating seamless team cooperation. Additionally, you’ll find a library of templates, as well as editing and styling tools, and compatibility with common document formats.. With accessibility from any device with an internet connection and a web browser, Google Docs enables users to work from virtually anywhere.
Getting Started
To begin using Google Docs, you will first need a Google account. If you already have an account, you can skip this step. If you don’t have one, you can sign up for a free account using the following link.
Once you have a Google account, go to the Google Docs website and sign in.
Creating a New Document
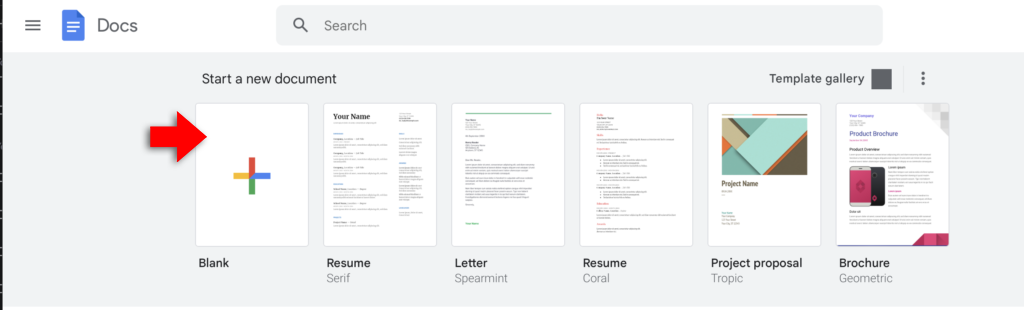
Select a blank document.
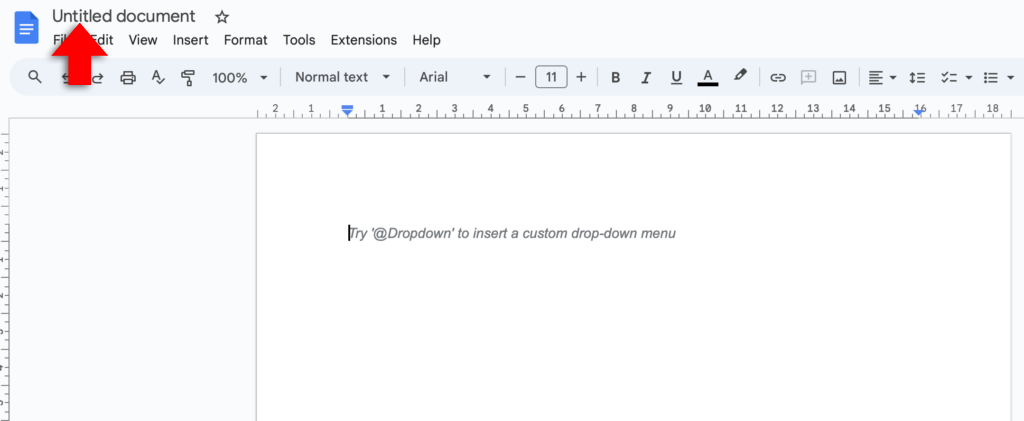
Click “Untitled document” at the top-left. Type in a meaningful name for your document then press “Enter”.
Start typing your content. You can also use voice typing. To turn it on, go to “Tools” menu, select “Voice typing”, click the microphone icon. Start speaking.
Text Formatting
Text formatting in Google Docs allows you to modify the appearance of text to enhance readability and emphasize specific content.
Use the text formatting options on the toolbar.
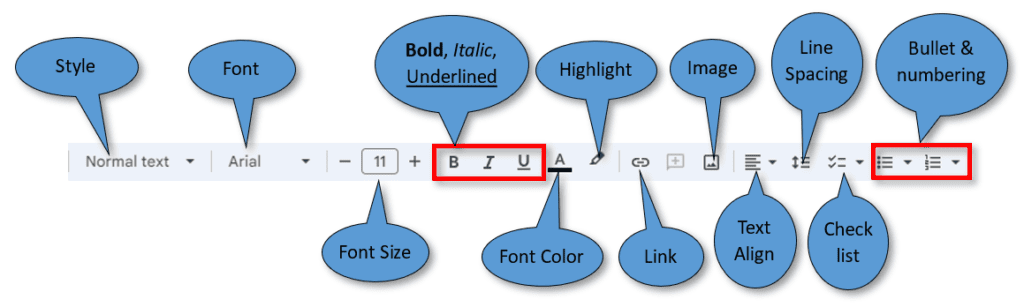
First highlight your text, then select an option from the toolbar.
1. Font Style and Size
Styles in Google Docs, refers to a set of predefined formatting options that you can apply to text. These options can include a typeface, size, color, paragraph alignment, and line spacing. Styles provide a way to apply consistent formatting to portions of a document with just a few clicks.
- Change Style: Click the “style” dropdown menu on the toolbar and select your desired font. Normal text style is for body text and paragraphs, heading 1, 2, 3 styles are for headings in your text, and so on. Title style is for document titles.
- Change Font: Select the typeface from the font drop down menu.
- Adjust Font Size: Click the font size dropdown and select or type the desired size.
2. Text Color and Highlight
- Change Text Color: Click the “A” font color icon and select a color.
3. Bold, Italic, Underline, and Strikethrough
- Bold: Select text and click the “B” icon or press
Ctrl + B. - Italic: Click the “I” icon or press
Ctrl + I. - Underline: Click the “U” icon or press
Ctrl + U. - Strikethrough: Click “Format” menu, select “Text” select “Strikethrough” or press
Alt + Shift + 5.
4. Text Alignment
- Align Text: Click the text align icon, choose left, center, right, or justify on the toolbar.
5. Line and Paragraph Spacing
- Adjust Spacing: Click the “Line spacing” icon on the toolbar and select your desired spacing.
6. Bullets and Numbering
- Create Lists: Click the bullet or numbering icon on the toolbar after placing your cursor where you want the list.
7. Indentation
- Adjust Indent: Click the increase or decrease indent icon on the toolbar.
8. Columns
- Add Columns: Click “Format” menu, select “Columns” then select the number of columns.
9. Text Effects
- Superscript/Subscript: Click “Format” menu, select “Text” then select “Superscript” or “Subscript”.
10. Clear Formatting
- Remove Formatting: Click “Clear formatting” icon on toolbar or use
Ctrl + \shortcut.
Inserting Images
In Google Docs, go to the “Insert” menu and select “image”. You’ll see a slide out menu appear with some options.
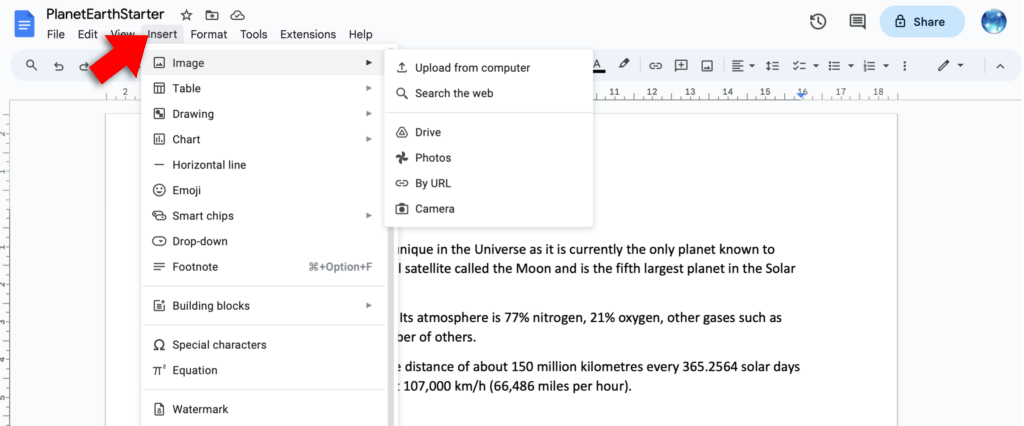
The first option, “Upload from computer,” allows you to insert images stored on your local device. When you select this, a file dialog box appears, enabling you to navigate through your files, choose the desired image, and insert it directly into the document. This is useful for adding personalized images, such as photographs or custom graphics, that may not be available online.
Next, the “Search the web” option opens a sidebar within Google Docs, providing a search bar to find and insert images from the web directly. You can type keywords into the search bar, and a selection of images related to the search term will appear. This feature is useful for quickly adding web-based images without leaving the document, ensuring a smooth and uninterrupted workflow.
The “Drive” option allows you to insert images stored in your Google Drive. This is especially useful if you utilize Google Drive for storing your media, as it provides quick access to these files without needing to download them to your computer first.
The “Photos” option enables you to access and insert images from your Google Photos account. This is handy if you sync your mobile photos with Google Photos, providing direct access to personal photos.
The “By URL” option allows you to insert an image by providing a direct link to it. This is useful when you want to embed an image from a specific web page or online platform by simply copying and pasting the image’s URL.
Lastly, the “Camera” option (if available) allows you to take a picture using your device’s camera and insert it directly into the document. This can be useful for adding real-time visuals to documents.
Further Reading

Understanding Google Docs
We’ve all been there before, staring at a computer screen with no idea what to do – don’t worry Understanding Google Docs is here to help. Written by best-selling technology author, lecturer, and computer trainer Kevin Wilson, Understanding Google Docs is packed with easy to follow instructions, photos, illustrations, helpful tips and video demos.
1 in stock