macOS includes a suite of native screenshot tools that support both immediate region selection and post-capture editing. Once captured, you can crop screenshots using the built-in Markup tools. Cropping is useful for eliminating sensitive information, focusing on specific areas, or preparing visuals for documentation or presentations.

Best way to crop while taking a screenshot
-
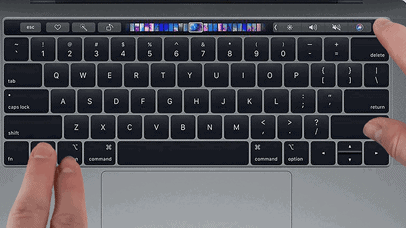
Press Command (⌘) + Shift + 4.
-
Your cursor turns into a crosshair — drag to select the area to capture.
-
Release to take the screenshot.
This method captures only the selected area, so there’s no need to crop afterward. The screenshot will be saved to your desktop.
How to crop an existing screenshot
-
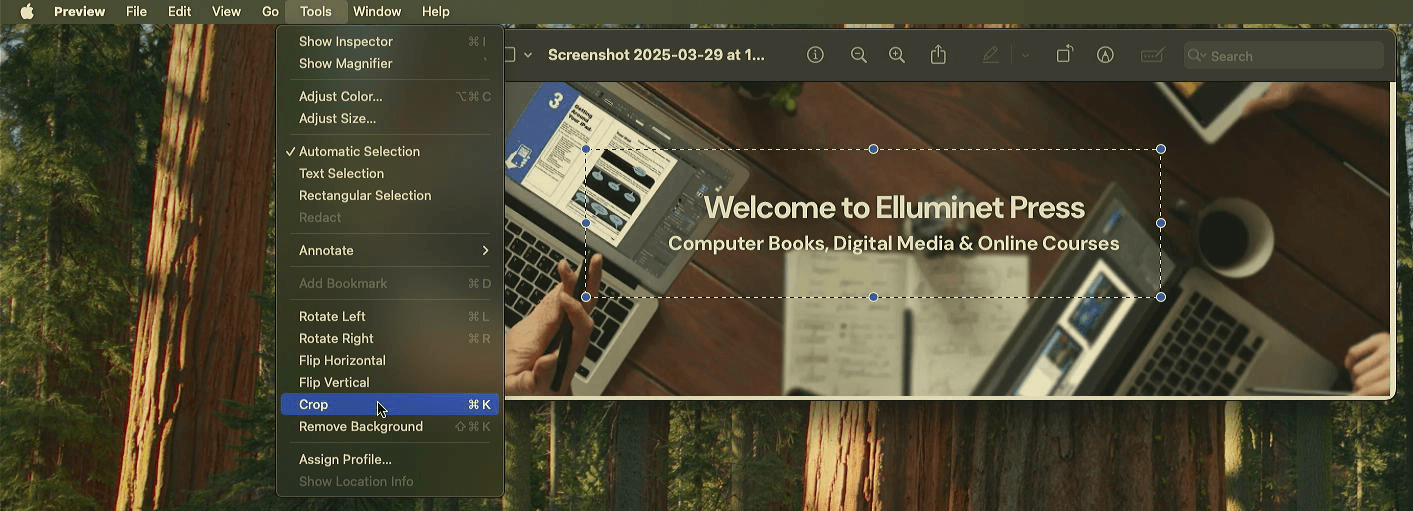
Locate and open the screenshot in the Preview app.
- Screenshots are usually saved to your desktop
-
You can double-click the image if Preview is your default viewer.
-
Once the image is open, click and drag your cursor to create a selection rectangle over the area you want to keep.
-
You can adjust the selection by dragging the corners or edges.
-
-
With the area selected, go to the top menu and click Tools > Crop.
-
Alternatively, use the shortcut Command (⌘) + K.
-
-
To save the cropped version:
-
Use File > Save to overwrite the original, or
-
Use File > Duplicate or File > Save As to preserve the original and save a new file.
-
Further Reading
For more information on the subject, have a look at the following book:
-
Original price was: £24.99.£19.99Current price is: £19.99. Buy now
Exploring Apple Mac: MacOS Sequoia Edition
Kevin Wilson