Enabling the Trusted Platform Module (TPM) feature involves interfacing with your computer’s BIOS or UEFI, where various system-level settings are managed. Note that the procedure may vary slightly depending on the manufacturer of your motherboard or pre-built system, so always refer to your specific manufacturer’s documentation when available.
1. Reboot Your Computer:
Fully shut down your system and turn it back on. This process ensures that all software currently running on your machine is stopped, and it puts you in a position to access the BIOS/UEFI settings.
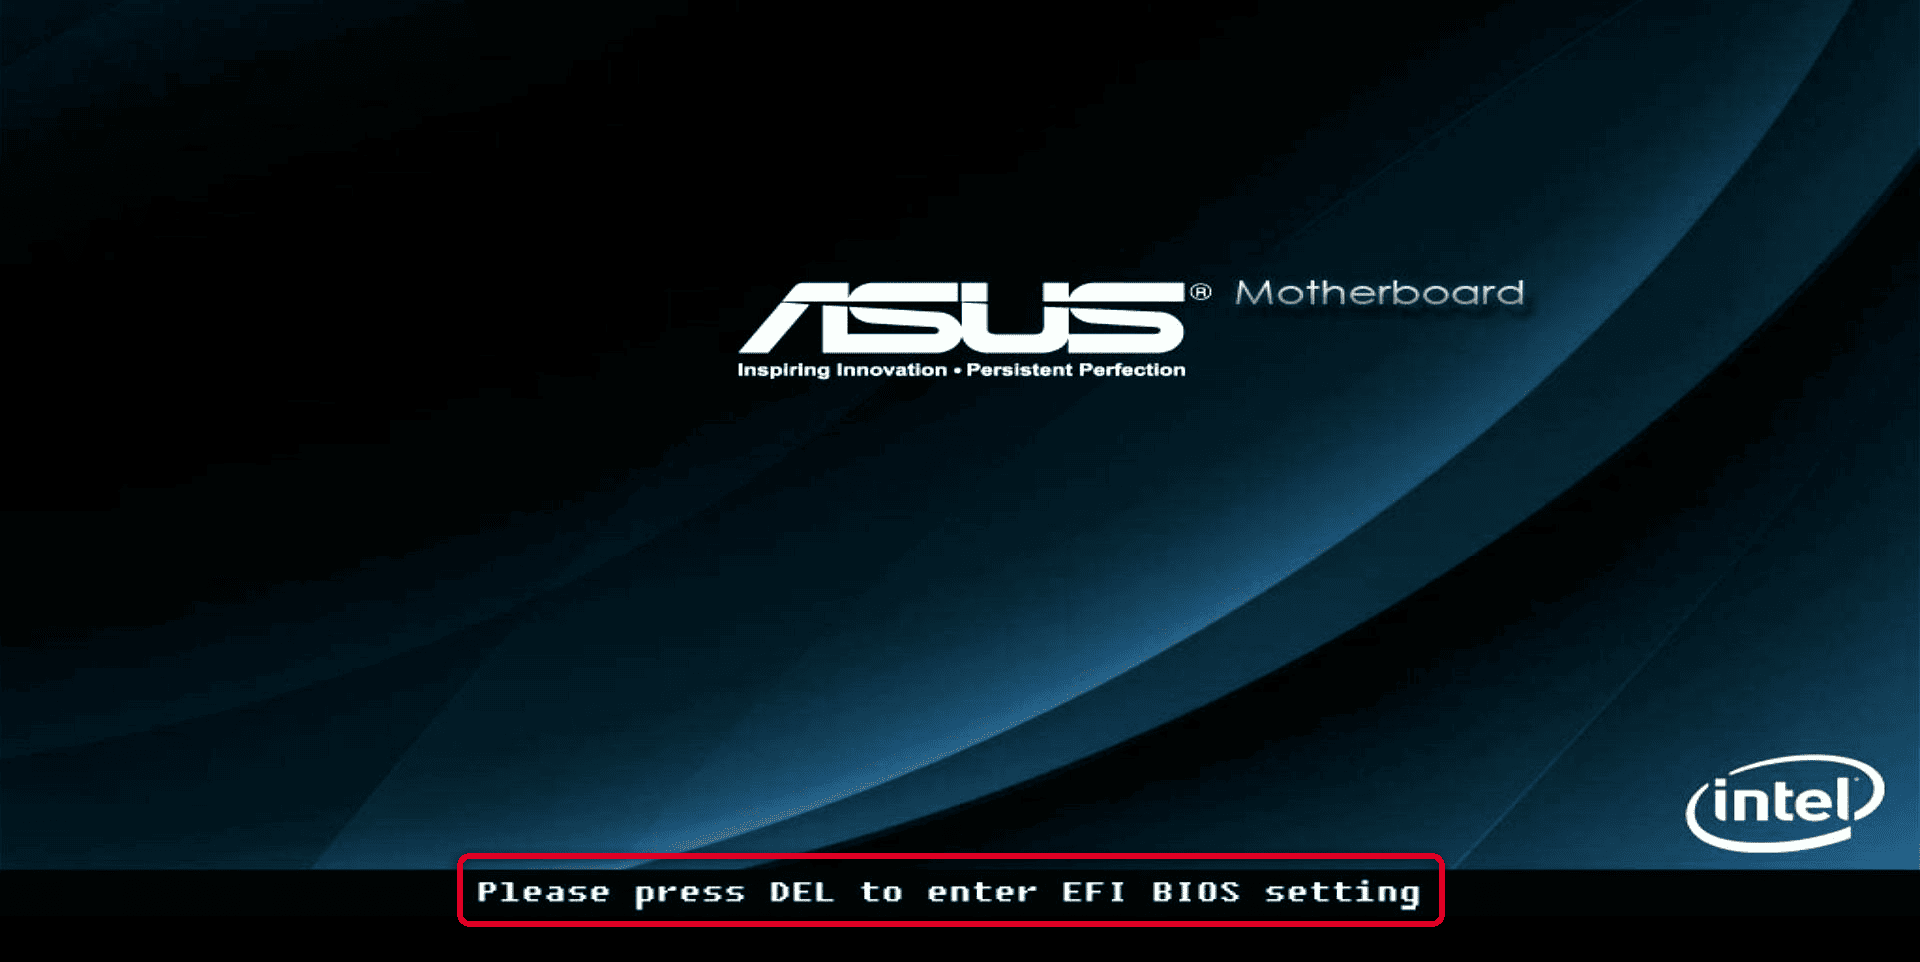
2. Enter the BIOS/UEFI Settings:
As soon as you power up your computer, you’ll need to press a specific key to access the BIOS/UEFI interface. This is usually indicated during the boot-up process, with a message like “Press [Key] to enter setup.” Common keys include F1, F2, F10, F12, DEL, or ESC, but it varies by manufacturer. For example, on this machine the key is DEL.
- If you miss the window to press the key at boot, don’t worry. You can simply restart your computer and try again.
- If you’re unsure about the key, refer to your computer’s manual, the manufacturer’s support website, or search the internet using your computer/motherboard model.
3. Navigating the BIOS/UEFI Interface:
Once inside the BIOS/UEFI settings, you’ll need to find the section or menu that contains TPM settings.
- The layout of BIOS/UEFI is not standardized, so it can vary significantly depending on the manufacturer and the version of BIOS/UEFI you’re using. Generally, you will use your keyboard’s arrow keys to navigate the menu, use the Enter key to select options, and the ESC key to return to the previous screen.
- Typically, the settings are divided into several sections, which may be represented as tabs, lists, or graphical icons. Common sections you may see include Main, Advanced, Power, Boot, Exit, and Security.
- TPM settings are usually located under the “Security” or “Advanced” section. However, it could be located under other sections like “Chipset” or “Boot”, or under a category like “System Configuration” or “Trusted Computing.”
- You may also have to navigate through several layers of menus to reach the TPM settings. For instance, you might have to go to Advanced > CPU Configuration > Security Features, or Security > TPM Configuration.
- Each option in BIOS/UEFI should have a brief description, which can help you figure out what each setting does.
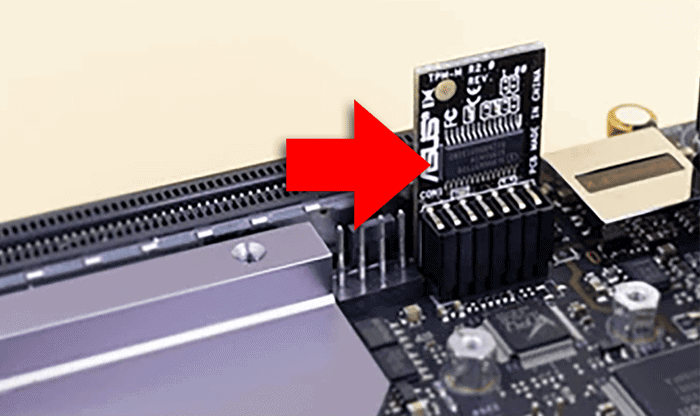
4. Locating and Enabling TPM:
The TPM setting might not always be directly labeled as “TPM”. It could be listed under different names depending on your system’s manufacturer and whether you’re using an Intel or AMD processor.
- On Intel systems, the TPM option might be called “Intel PTT” or “Platform Trust Technology.”
- On AMD systems, it could be referred to as “AMD fTPM” or “firmware TPM.”
- If you find an option labeled TPM, PTT, or fTPM, select it. You’ll then be given an option to either enable or disable it. You should choose the “Enable” option.
- In some BIOS/UEFI systems, instead of giving you a direct option to enable or disable, it may give you a list of settings to choose from. In this case, you might see settings like “Disable”, “Enable”, “Auto”, or “Enabled but Hidden.” Choose the “Enable” or “Auto” option.
- It’s important to note that you may not see the TPM option at all if your hardware does not support it or if the option is hidden until you enable other settings. For example, some systems require you to set a supervisor or admin password in the BIOS/UEFI before you can change the TPM settings.
- After selecting the TPM option and enabling it, you may need to press the Enter key to confirm your choice, or it might simply take you back to the previous menu.
5. Adjusting TPM version, if applicable:
Depending on your system, there might be an option to select the TPM version.
- If your hardware supports both, you’ll usually see options for TPM 1.2 and TPM 2.0.
- You’ll need to choose TPM 2.0 for Windows 11 installations.
6. Saving Changes and Exiting:
After enabling TPM:
- You’ll need to navigate to an “Exit” or “Save & Exit” section. Sometimes there might also be a key that you can press to perform this action, like F10.
- Be sure to save the changes you made. The BIOS/UEFI will prompt you to confirm that you want to save. Confirm it.
7. System Reboot:
Once you’ve saved your changes and exited the BIOS/UEFI, your system will restart.
- During this process, it will initialize the TPM, assuming it was properly enabled.
8. Verifying the TPM Activation:
After your system boots up, you can verify that the TPM is active:
- Press the Windows key + R to bring up the “Run” command.
- Type “tpm.msc” and press Enter to open the TPM management console.
- Under “Status,” it should state that the TPM is ready for use.