By default, the macOS Mail app tries to set up your email account automatically. For major services such as iCloud, Gmail, Outlook, Yahoo, and Microsoft 365, there are built-in configuration profiles that contain the correct IMAP, SMTP, port, and encryption settings. For other providers, the Mail app attempts to retrieve these settings from the server. If your hosting company supports one of these protocols and it’s set up correctly, the process works without any manual steps. However, some hosting companies and custom domain email services do not provide auto-configuration, or their configuration records are incomplete. In these cases, you’ll need to manually enter the incoming and outgoing mail server details provided by your email host to ensure messages are sent and received correctly.
Launch the Mail app. In the menu bar, go to Mail → Add Account…

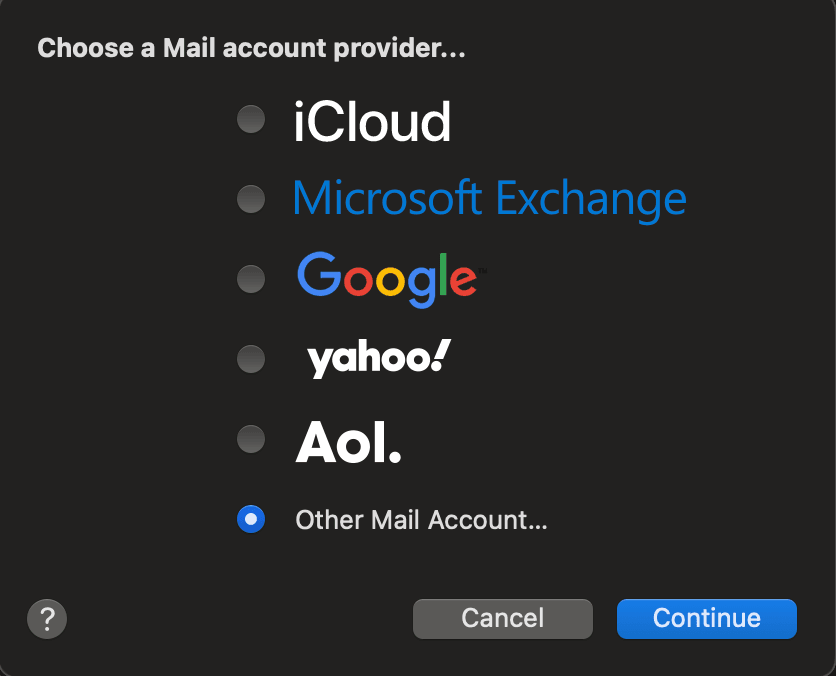
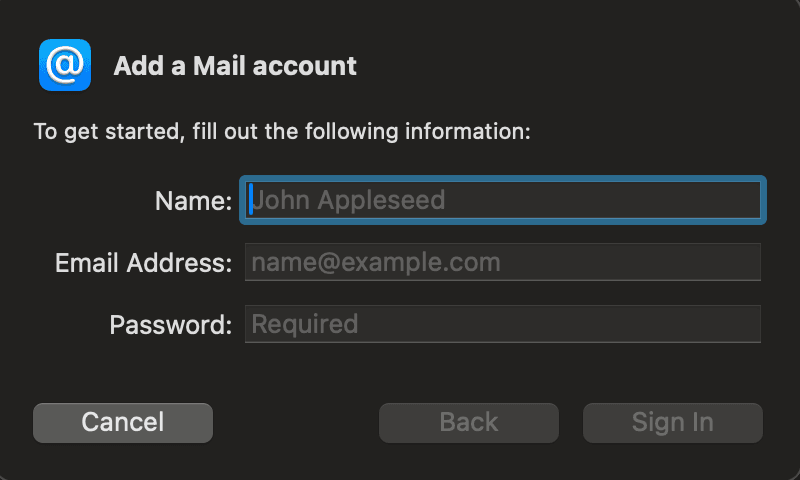
When prompted, choose Other Mail Account… and click Continue.
Enter your name. This is the name that appears on your email in the recipient’s inbox. Then type in your email address and email password. Click Sign In. Apple Mail will now try to detect your email settings automatically. If it succeeds, your account is ready to use.
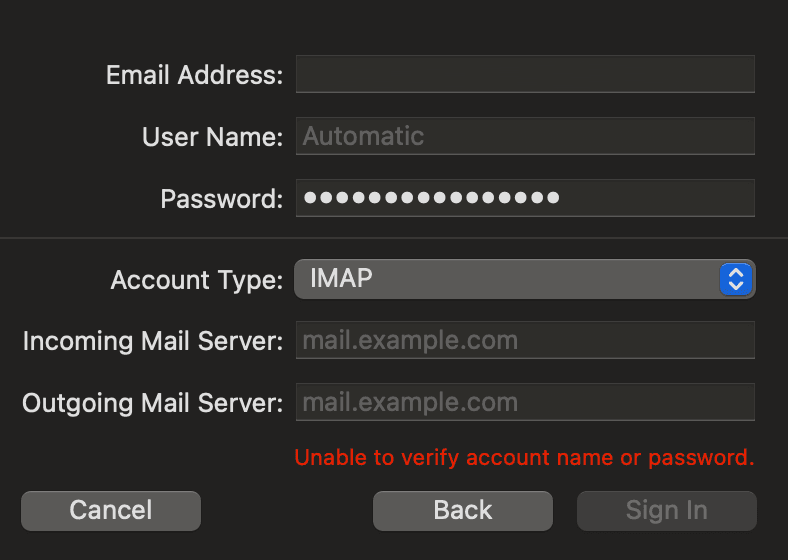
If it fails — which is common with some hosting providers, this means you’ll need to enter the server settings manually, which ensures everything is configured correctly for your host. In the Email Address field, type your full email address exactly as it was created with your hosting provider. In the User Name field, replace “Automatic” with your full email address, because some providers will not accept just the part before the @ symbol. Enter your mailbox password in the Password field. Leave the Account Type set to IMAP. For the Incoming Mail Server, type the IMAP server address your hosting provider gave you. For the Outgoing Mail Server, type the SMTP server address from your provider. Click ‘sign in’.
This should be enough to add the account. If not, open Mail → Settings → Accounts, select your new account, and go to Server Settings.
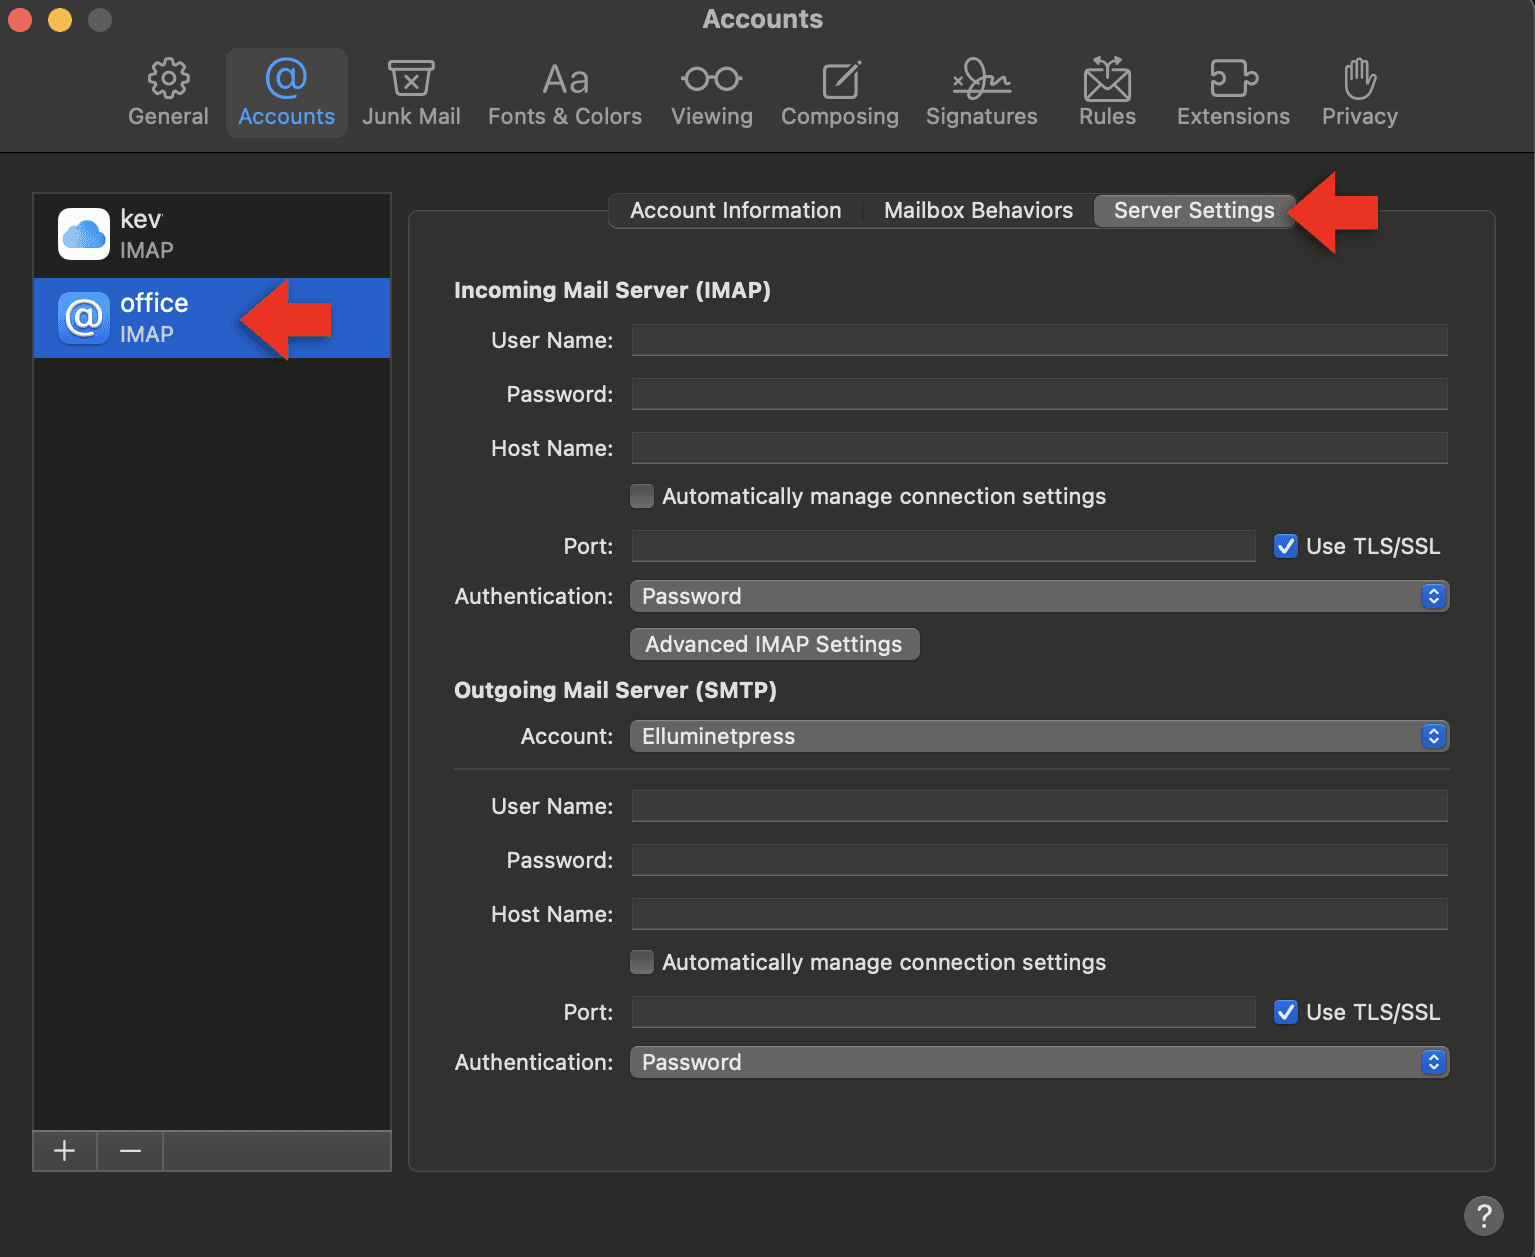
Turn off the option to automatically manage connection settings for both incoming and outgoing mail.
Check that the incoming server is set to port 993 with TLS/SSL enabled and the outgoing server is set to port 465 (for SSL) or 587 (for STARTTLS) with TLS/SSL enabled.
Make sure authentication for both is set to use your full email address and mailbox password. If you see a certificate warning, choose to trust it and continue.
Further Reading
For more information on the subject, have a look at the following book:
-
Original price was: £24.99.£19.99Current price is: £19.99. Buy now
Exploring Apple Mac: MacOS Sequoia Edition
Kevin Wilson