In Microsoft Excel, the Data Entry Form is a feature that allows you to enter data into a spreadsheet in a form-like interface, which can be more convenient than entering data directly into the cells, especially when dealing with a large number of columns.
Imagine you have a spreadsheet that tracks sales data, and you want to enter new sales records using the Data Entry Form. Your table has columns for Date, Product Name, Quantity Sold, and Sales Amount.

Add Form Icon to Quick Access Toolbar
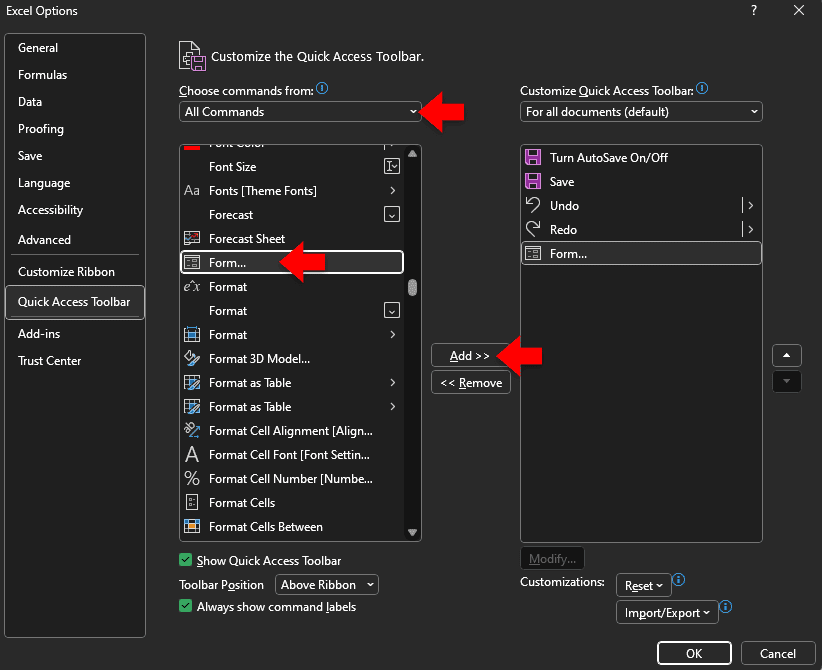
Click the small down arrow on the Quick Access Toolbar at the top of Excel. Choose “More Commands…”
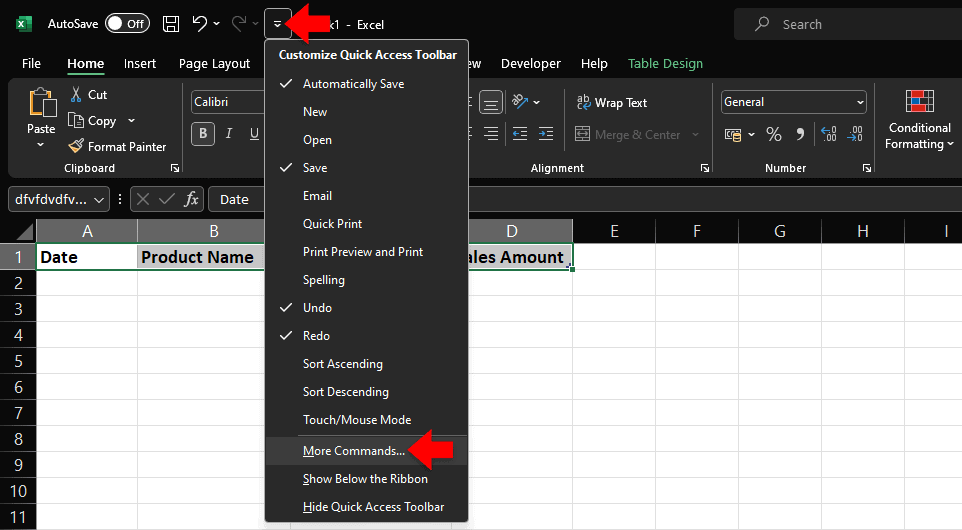
In the “Excel Options” dialog box, select “All Commands” from the “choose commands from” drop-down menu. Scroll down the list and select “Form”. Cick the “Add >>” button to add it to the Quick Access Toolbar. Click “OK” when you’re done.
Using the Form to Enter Data
To use the data entry form, first you need to convert your spreadsheet to a table. Tables allow you to use column headers to refer to columns of cells. To do this, select the cell range (in this example, cells A1 through to D1)

Go to the the “Insert” ribbon tab, then select “Table”. You can also press Control T on your keyboard. Make sure you check “my table has headers” in the dialog box that appears. Click “ok”, when you’re done.

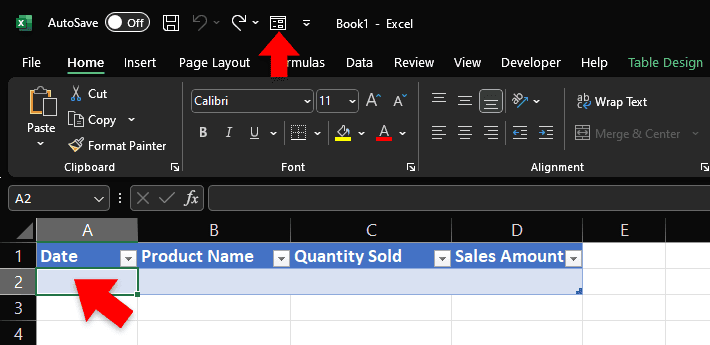
To enter your data, select the first cell in the table (eg A2), this is the first entry. Click on the “forms” icon on the quick access toolbar on the top left.
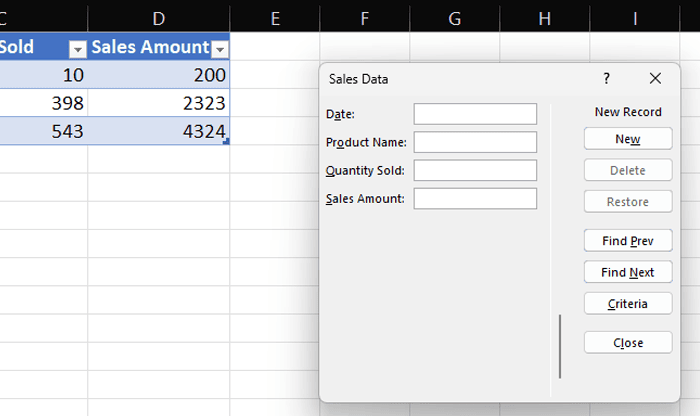
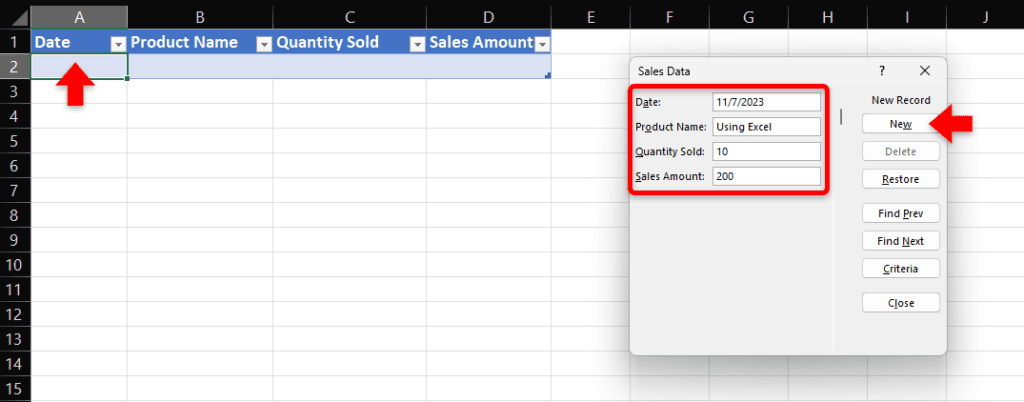
You’ll see a data entry form appear with the same fields as the headers in your table. Enter the required data for each of these fields, then click “new record”.
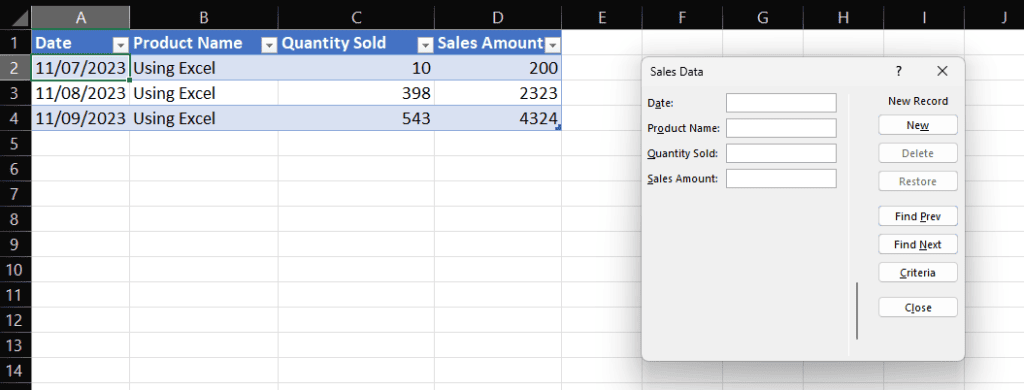
Add all your records. Click “close” when you’re done.
Further Reading
For more information on the topics discussed, have a look at the following book
- Original price was: £24.99.£16.99Current price is: £16.99.Buy now
Using Microsoft Excel – 2023 Edition
Kevin Wilson
